Are you looking for some exciting autumn and fall science experiments for your kids? This article worth your click to explore a lot of experimental activities!
Autumn is genuinely a great time of the year when colorful leaves fall underfoot. It is also a hint of winter. Why don’t you take advantage of this time to take your children outside and enjoy this season? They will happily immerse themselves in the beauty of the autumn by collecting a pile of leaves in the backyard.
The new season’s coming also gives you and your kids opportunities to discover some autumn and fall science experiments. If your children are science explorers, they might want to carry out some enjoyable fall-themed experiments.
There is a wide range of educational but entertaining experiments for your children to do during this autumn. Let’s check them out now!
Why Are Science Experiments Important For Children?
As you may know, science benefits children with crucial life skills. For example, they can learn how to communicate, stay focused, and remain organized. Moreover, they also can develop their overall awareness and senses.
The world around us is a mystery and contains many things to explore. By interacting with the natural environment, children can learn through playing and achieve intellectual development.
To support children in learning science, parents should give them space and time to explore. Besides, it is necessary to value their questions and help them find the answers. Your children will grow better in physics and mental health when they know that parents are their companions in this exploration.
Last but not least, you should make use of the items at home instead of spending money to purchase science supplies.
Awesome Autumn and Fall Science Experiments
1. Making Slime
Slime is a popular toy for children these days. Almost every kid love slime, and your children might not be the exception. There are many videos on YouTube teaching how to make slime, and they are easy to follow. Your children will be cheerful when they can make their slime and play with it every day.
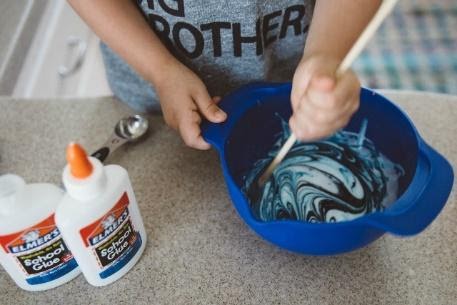
You have to prepare some school glues, liquid starch, tap water, and some food colorings to make slime. Keep in mind that slime is not edible, so if you have tiny children, you should ponder that it is safe to make slime for them to play or not.
Here are some simple steps for you to make slime:
- You pour glue into a big plastic bowl. Measure the water and glue equally. For instance, if you use half of the glue bottle, it is better to use ½ cup of water.
- Mix the glue and water well.
- Add the same amount of liquid starch (for example, ½ cup) and mix them. You can let your kids experiment with the measurement. If the water is much more than these two other ingredients, the slime will get runnier. So, you can ask your kids to check and get the consistency that they like.
- Finally, you add the food coloring and mix all up one more time.
The slime will be firmer if you put it in a plastic container. There are many other ways to make the slime more impressive by adding glowing paint. Generally, the slime is a way for children to show their creativity and have fun simultaneously.
2. Tissue Transfer Experiment
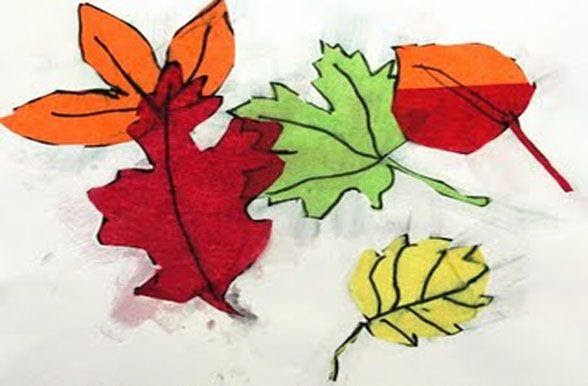
What can we do with the pile of leaves falling in the autumn? Let your children take leaves home and do some experiments. More specifically, they can find out how the color transfer from this surface into another one by tissue paper. They will explore the magical moment when leaves become orange, red, and yellow.
In this scientific process, you put paper leaves into the water before placing non-colorfast tissue paper above. Then, you can ask your children to make some predictions about what happens next. To find out the answer, children can test and compare the results themselves.
By doing that, children not only can enjoy the experiments, but they also grasp scientific knowledge. Finally, you can incentivize them to talk about the process the tissue’s color ends up on the paper. More difficultly, you can ask them why other objects cannot produce a similar effect.
To conduct this experiment, you can ask your children to draw a leaf onto paper first. After that, you should prepare some materials such as scissors, paper towels, red/ yellow/ orange tissue paper, water, and cardstock/ white construction paper.
3. Color Change
Every kid is definitely curious about why leaves change color in the autumn. Most parents might be perplexed with this question, as it is tricky to explain. How about letting them experiment with these leaves to discover themselves?
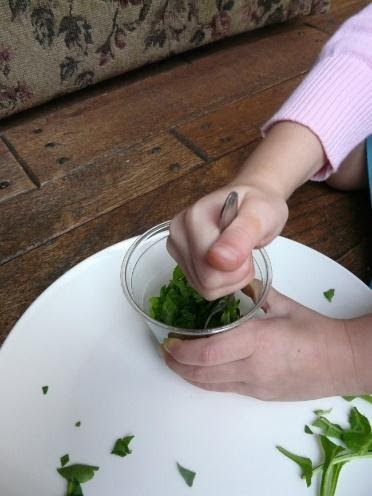
This simple experiment needs you to have rubbing alcohol, three leaves from a tree, plastic wrap, a paper coffee filter, a jar, and a small bowl. First, you ask your children to break leaves into small pieces in the jar. Afterward, pour the rubbing alcohol into the jar and make sure all the leaves are covered.
Let your children keep mashing the leaves well and stir them in the alcohol until the alcohol changes slightly green. Next, you cover the jar with plastic wrap and put it into a bowl full of hot water. Wait for 30-45 minutes to see the alcohol turning in very dark green. This is an excellent time to challenge your kids’ patience.
Eventually, you ask your kids to cut the coffee filter’s strip and place it in the jar. The strip will absorb the liquid, and the color separates when the alcohol evaporates. For full effect, you should let it happen in 1 hour, at least. Your kids will be delighted to see the leaves turning yellow color in the fall.
4. Candy Creations
The autumn’s coming is attached to the Halloween festival. With leftover Halloween sweets, you can let your kids’ engineering ability progress to another level. Requiring them to build structures with pumpkin sweets will be a great idea.
Your kids can explore the building art and consider it thoroughly to have a fair distribution of weight and balance. For this building activity, you just need candy and toothpicks. Then, you can let your kids do what they want.
Before starting, you can give them two options to make this activity more challenging. Option 1 can be to build any structures with toothpicks and candy, and the designs can stand. Option 2 is to create the tallest structures with a specific number of sweet and toothpicks.
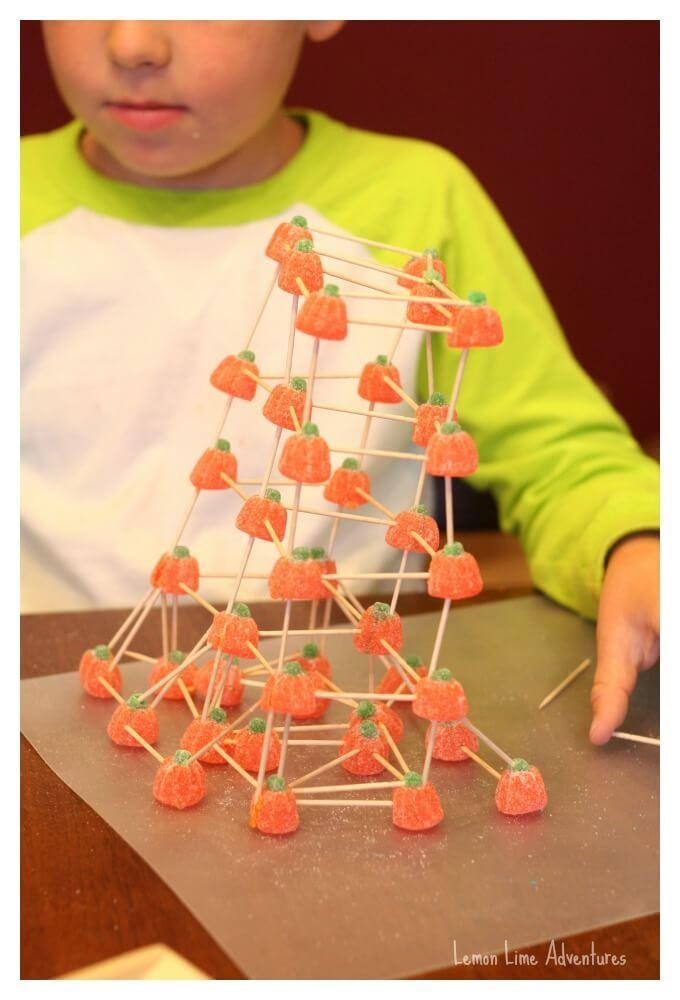
When doing the candy creation activity, both of you and your children will be astonished by the result and benefit. The benefit for children is that they can realize math-related things or patterns. In terms of parents, they can be surprised and proud of their children’s creativity and intelligence.
5. Science with Pumpkin Seed
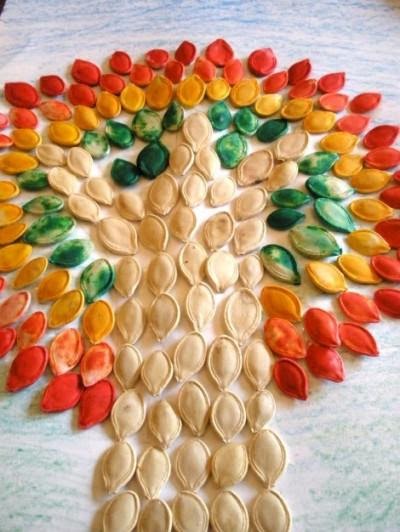
Halloween time cannot lack pumpkins. People like to carve Jack O’lantern, put the candle inside them, and place it at the gate or in front of the door as decoration. Making use of the pumpkin seed in this case to make children hands-on discoveries will be the most ideal.
This can be used to do sensory activities. Specifically, you can ask your kids to close their eyes and describe how they feel about the pumpkins inside. Then, you scoop out the pumpkin seeds and guide the children to dry them. Give your kids some food colourings to add into a bag, let them put the seeds inside, and toss all of them.
After the seeds are dried, they become perfect materials to make several mini mosaics. You can buy some card stock paper and clear-drying glue for this mosaic activity. Subsequently, you ask your children about some ideas to make the mosaic and help them to glue the colorful seeds according to their preference.
There is plenty of mosaic samples that you can see on the Internet and apply to your activity. It would be best if you did not ignore this pumpkin seed science as it is easy to do and super fun. Your kids can do both science and fall craft to decorate the house.
6. Pumpkin Volcano Experiment
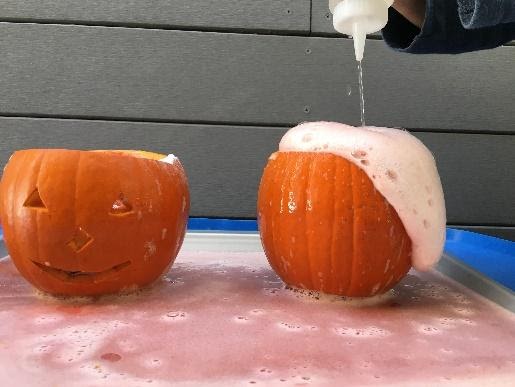
Again, pumpkin time is coming! Blending with baking soda, your young scientists will have one of the excellent science experiments. The kids will be surprised and cheerful with the erupting pumpkin volcanos in this autumn and fall science experiment.
Coming to this experimental activity, you need a pumpkin, vinegar, baking soda, food colouring, dish soap, a tray, and a measuring cup. Firstly, you cut out the pumpkin’s top and take out the seeds. Put the pumpkin onto a big tray in case the volcano makes everything messy.
Now is the experimental part. You pour a few spoons of baking soda, then some drops of dish soap and food colouring into the pumpkin. Before carrying out this experiment, you should give your children eye droppers. It’s time for the pumpkin volcanos! You pour vinegar into the bowl and watch the fun.
Besides, you can repeat this process again and again with more baking soda and vinegar. The foamy eruption is given from the dish soap. As you can see, with some basic cooking ingredients, you can make your kids utterly amazed.
7. Making Magnetic Slime
With this idea, slime is not ordinary slime anymore. It’s a magnetic slime. Your kids will see a liquid moving without touching it or watch the slime swallowing the magnet on top. Is it different from making the regular slime? Let’s discover its materials now!
So, you need liquid starch, iron oxide powder, PVA glue, a neodymium magnet, and some measuring spoons/cups for magnetic slime. To begin with, you pour ¼ cup of PVA glue into a big bowl and two tablespoons of iron oxide powder. Then, you mix them up, and the mixture will look like the Oreo cookie crumbs.
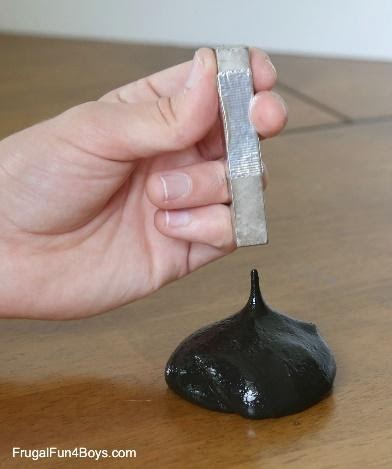
After, you pour 1/8 cup of liquid starch into the bowl and stir them. If you see some unmixed starch on the slime, you can rinse the slime under cold water for a few seconds. Finally, you use your hands to knead the slime.
If the slime is too stringy, you can knead in more glue. Conversely, if it is too sticky, you add more starch. Additionally, the iron oxide powder might not be suitable to breathe, so that you should give your children some masks.
8. Bubble with Pumpkins
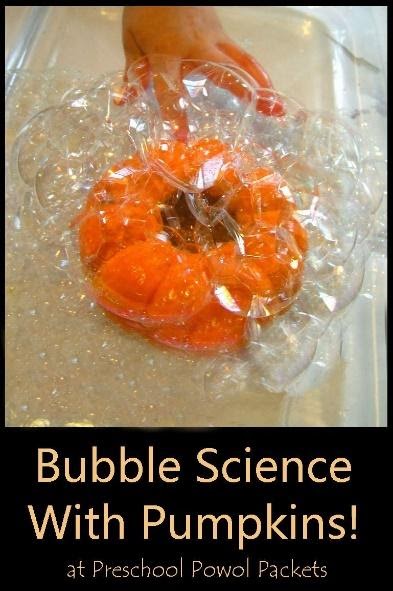
It seems that pumpkins are useful for all the science experiments in autumn. This is another idea with pumpkins. Every child likes to play with bubbles; why don’t you take advantage of them to do an exciting experiment for your children?
The materials are easy to prepare. They are pumpkins, dish soap, straw, and water. You fill the water in the pumpkin at a half and add dish soap. Next, you start to instruct your kids to blow bubbles by the straws. You can allow your kids to set up the pumpkins by themselves as they may want to do that.
Accordingly, you can show that the fingers will pop the bubbles while the straw cannot do. It would be better to ask them to think about it, and the kids will also want to try to put their fingers into bubbles. Through this basic experiment, you can show and discuss some science points with your kids.
However, this experiment may be much more suitable for pre-schoolers. They can both enjoy playing bubbles and learning science simultaneously.
9. Making An Acorn Burner With Little Oak
We all know that in the oaks are small insects. Depending on your activities, they will be affected in many ways. If you want to observe your handcrafted experiments on oak berries, there are a few things you can try. Perhaps you will get more fresh inspiration for your plan for the oaks.
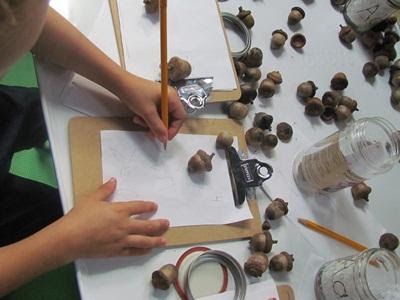
To experiment, you need the following tools:
- Acorns fruit
- Tin Muffin
- Magnifying glass
- Mini filter net
- Water bowl
- Tweezers
- Chestnut cake
- Chestnut clip
The above essential tools are essential for the exciting activities of scientific research projects for children. Children will need to use their math, science, and fine motor skills to process these experiments.
For the small pile of fruit you’ve just earned, you can have your child warm-up with simple transfer skills or one-to-one counting. You might ask simple questions such as how many pods are needed to get enough fruit or how many less? This essential counting skill will gradually increase your child’s interest in the activity.
Acorns are both a fun game and an activity to help children use their thinking. It is an activity that helps children improve their mathematical and scientific memory. It also enhances many other skills, such as reading, writing, playing, and art. Train your child in the habit of collecting oaks while hiking in the wild in the fall.
Alternatively, you can read together a remarkable fall book like “Earl the Squirrel” or draw a picture of autumn. Fall learning ideas are always the start of a perfect preschool lesson plan. Another scientific discovery activity on oaks that you can give your child to experience is using a handy wooden chestnut clip.
This chestnut clip offers children the opportunity to strengthen their hands and gives them a chance to explore. They can see for themselves what is in those oaks. Surely children will be too interested in this activity; even small worms can make them curious.
10. Exploring Lemon Lime Adventures By Dissolving Peeps
Before performing this dissolution experiment, you need to prepare the following materials for your child:
- Country
- Milk
- Oil
- Vinegar
- Tonic water
- Peeps (you can use any, but pumpkins will be the right choice)
Besides, if you have time, you can prepare the following materials: (not also because they are not required)
- Pipettes move fluids
- Timing clock
Then, make sure all the settings are done:
Take out 5 cups and fill the cups with an equal amount of liquid.
For convenience, you can place pumpkin candy in a bowl near the glass.
Now, let’s start doing the Peep dissolution experiment!
The experiment to dissolve these candy pumpkins can make your child too excited. They will have a chance to observe how the sweets they love to eat are made and dissolved.
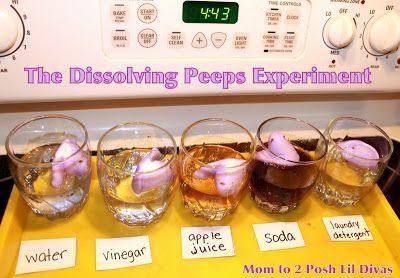
First of all, you should discuss this experiment with your child and ask him what he thinks will be the experiment results. If you have time, make a small chart so that you can easily see your child’s observations before experimenting. Predict how long these candies will take to dissolve in each liquid.
When you want to listen to your child’s thoughts, you can both understand it and its cognitive abilities. Ask your child for their thinking and reasoning about the predictions it makes. The important thing is not how it predicts right or wrong, but how it argues for its thoughts.
To measure the dissolution rate, you will need a stopwatch. It would be best if you used a stopwatch that is easiest to understand so that children can easily observe and understand the operation.
After 10 minutes, use the pipette to pour some liquid on top of each peep. You should let your child do this on their own. This test will take about 20 minutes. It is a good time for elementary children’s investigations.
11. Exploring The Properties Of Squash Liquids With The Pumpkin Oobleck Experiment
Pumpkin Oobleck is a game with cornstarch and water. This wonderful sensory experience has received the love of many children of all ages. This game is not merely entertainment, but it also allows children to explore fluid science.
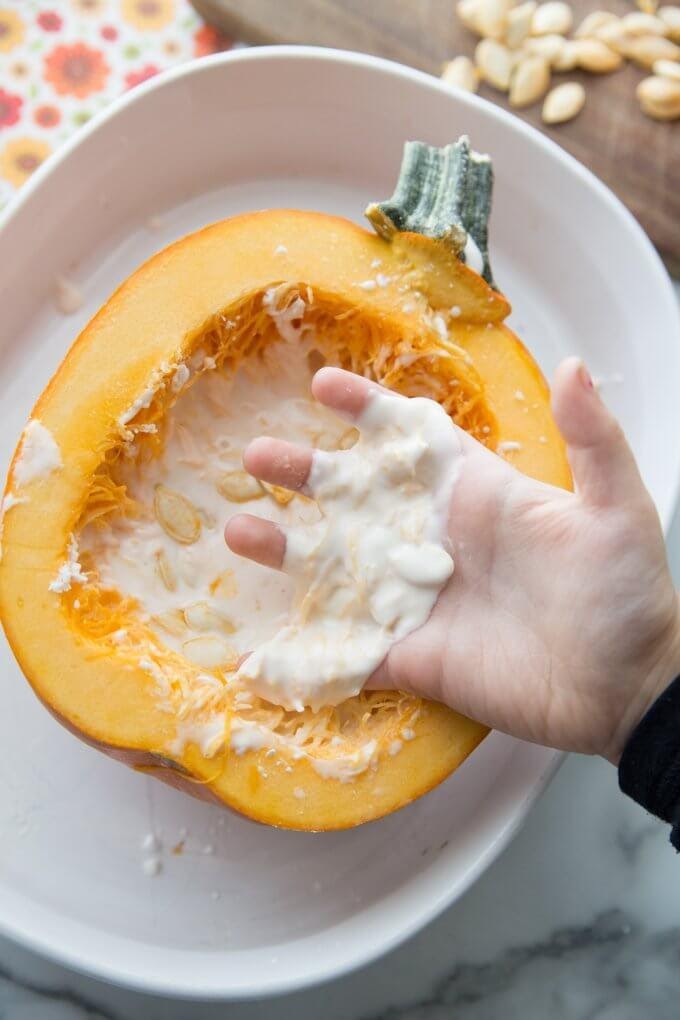
Before experimenting, you and your child will have to prepare some of the following materials:
- The inside of a pumpkin and remove the seeds.
- Grinder
- Cornstarch
- Country
After thoroughly preparing the materials, experiment according to the following steps:
First of all, separate the seeds inside the pumpkin. Don’t whip them because you can roast them.
Pour the inside of the pumpkin with a little water into the blender to mix.
Add more water and mix them until you create a smooth mixture.
Take a clean bowl and add one cup of cornstarch.
Take half of the pumpkin mixture and add it to the cornstarch. Continue adding until it has the consistency you want.
The 1: 1 ratio between cornstarch and water is the perfect ratio for creating the mixture you want. Besides, you can also let your child mix the two ingredients by themselves according to their wishes.
12. Creating Leaf Sculpture With The Fall STEM Challenge
Before you let your child do the activity, get them used to this experiment gradually.
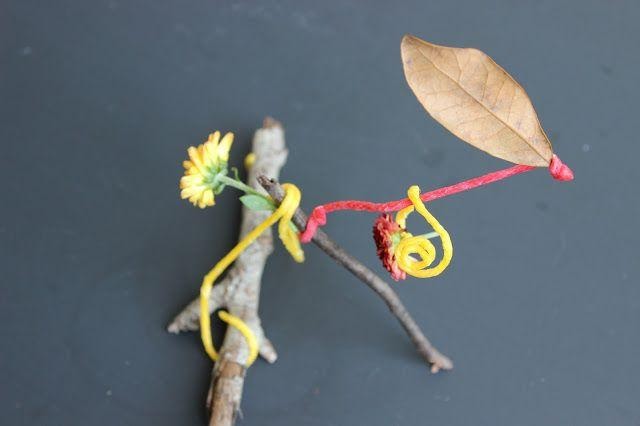
Step 1: Walk together on the leafy path.
Take your child for a walk around and see how the natural world changes as the fall came. Suggest your children’s stories about autumn.
What colors do children see in autumn?
How do the leaves on the tree change?
Then, with your child, collect as many types of leaves as possible. But they must have a different color and shape.
Step 2: Show your child videos about the fall season.
Short video clips of the color change will help children become more aware of what they have observed in the coming fall. You can go to Youtube and show your kids the video Brain Pop Leaves.
Step 3: Experiment together.
First of all, you need to prepare the following materials:
- Young leaves have been collected.
- A ruler
- Wikki Stix
When doing this, please:
- Ask the child to use the 6-inch falling leaf to make a sculpture on it.
- Solve challenges with your child.
- How should this be resolved?
- What shape will you build for it? Should you use sticks or twists? If your child can’t think of any ideas, give them a few suggestions.
Step 4: Check again.
Make sure the children’s sculptures are more than 6 inches tall. After the test is complete, record the results in the results chart.
13. Watching The Pumpkin From The Inside Out
Use pumpkins of different colors and sizes for children to observe, touch, and draw for themselves. After a while, cut them in half for the children to see inside. Besides, you can have your child pick up pumpkin seeds on their own using tweezers.
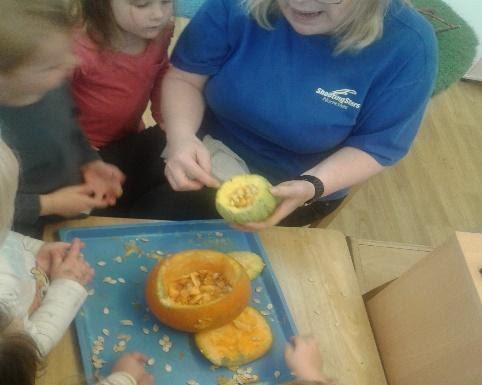
Additionally, painting activities is also an enjoyable experience. After letting your child observe the pumpkins, ask them to redraw what they visualize and remember.
14. Checking Out Fall Flowers In A Water Bath
This activity is suitable for preschoolers. To do this experiment, you need to prepare your child with flowers. After collecting and sorting them, you distribute each cup of flowers to the children and start letting them drop flowers into the large water bath. This experiment is quite simple and does not take time, and still makes the child interesting.
Then ask your child how the flowers will change. Ask your child to make some predictions. Will the flowers in this large water bath sink or float? Let the kids let go of themselves and watch their actions.
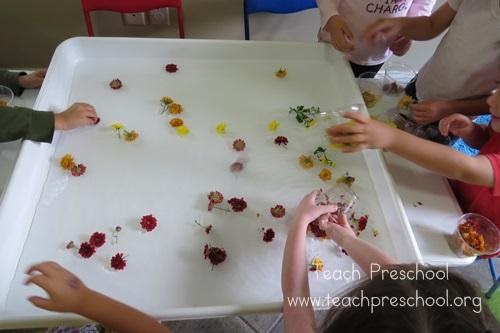
It is easy to see that the flowers will float on the water. Then, can you have your child do another experiment like how the flowers move through the water?
You can use the plastic tub for the washing machine if you do not have a real tub. Be sure to use one that doesn’t have holes to ensure the water does not get lost.
15. Checking Out The Fall Seeds
There are tons of seeds to explore in the fall. This activity will be a fun experience for your child to learn more about seeds and plants; if you have a collection of nuts, then great. Children will be too excited when doing this experiment.
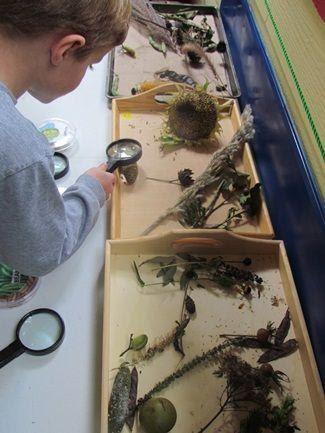
To make it easier for your child to observe the seeds, you can give them a magnifying glass. Moreover, they can use their hands and tweezers to pull the seeds out of the pod for a closer look. You can collect a few seeds from the plant and put them in a tray. Divide the children into separate groups and share them with each petri dish so that they can explore freely.
If you have free time, you should check out and survey a few seeds and plants. It will give your child more materials to observe. Autumn is often full of trees and seeds, so you do not have to worry about shortages.
16. Observe How the Liquid Affects Apples
You need to prepare some of the following ingredients before experimenting:
- Apple
- Lemonade
- Vinegar
- Tonic water
- Soft drink
- Country
- Small carrying case
- Experiment log
This science experiment will help your child see how apples will be affected by different fluids. Then set up an investigation.
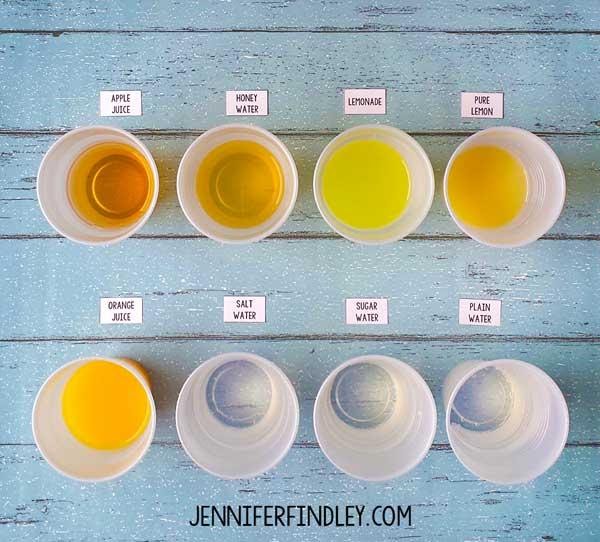
First of all, you take out five containers and put in a few apples. Be sure to label each box with the names of the liquids you will be adding.
After you have sorted out everything, you and your child pour the liquids they want to observe into each cup. You can keep a separate cup of apple slices without any special liquid. Then wait about 15 to 30 minutes and watch the experiment.
Check how the apple has been transformed. Ask your child about their thoughts upon seeing these apples. Remember to write your results on the lab report.
17. Using Pinecones To Set Up A Pinecone Weather Station
You can set up a pine-shaped weather station for your child outside of your garden. But remember that you should put it somewhere where you and your child can easily observe the changing of pine fruit each day. Alternatively, you can attach them to windows with clay or glue. Even when the weather changes, they don’t change.
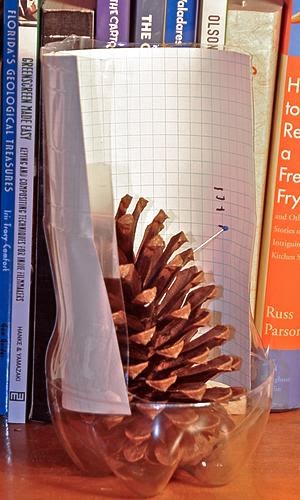
On dry days, the pods usually open. Otherwise, they close when it rains. This way of observing the weather through this pine tree is exciting so that children can be more aware of what the weather will be like.
Depending on the humidity, the pinecones will open or close so that the seeds can spread faster. On the inside of the pinecone is the valve of light feathers. When the weather is dry, the pinecones will open on their own to let the winds disperse the seeds in the air away from the old tree.
On the contrary, the pinecones will close when it starts to rain, and the humidity increases. It will prevent the seeds from escaping. If the seeds come out at this high humidity, the seeds will be soggy.
18. Discovering How The Pumpkin Grew
To make this experiment easier for your child, you can use real pumpkin seeds, grapes, flowers, zucchini, or pumpkin. Invite children to tell some of their stories with pumpkins they observed themselves in their garden.
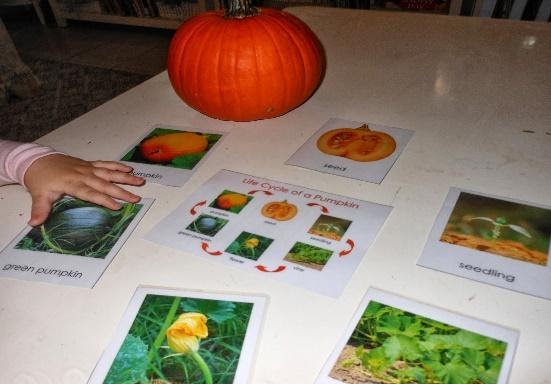
You should have a large, fully grown pumpkin ready. Have the kids walk around it to see if they notice anything. Continue to discuss the life cycle and have your child plant the pumpkin seeds themselves in a plastic bag.
After that:
- Ask your child to soak a cotton ball in the water.
- Remember that cotton balls are absorbent but not slightly wet.
- Ask your child to squeeze out the water.
Your child will place the cotton ball in a large bag and place a seed from the pumpkin.
Ask your child to predict how the other will grow. Don’t forget to carefully seal the bags containing the seeds to observe the results. This experiment will take time for the seeds to grow, but it’s interesting.
The Bottom Lines
Above are some entertaining and straightforward autumn and fall science experiments that you can do with your kids. It would help if parents can teach their kids science-related topics and help them to explore more. For the development of your children, you should encourage them to question and discuss their surroundings.


 Awesome Montessori Activities To Teach Alphabet For Young Children
Leave a Reply